Getting Started: Required Assets
Before we begin building our UBF project, you’ll need a few basic assets to work with. For this tutorial, we’ll be using a simple 3D model of a party hat. You can download the starter asset pack from the Asset Creator Pack Additionally, ensure you have installed compatible versions of UBF Studio and UBF Previewer. For installation instructions, see the Installation and Setup sections for the respective apps:Creating a UBF Project
Let’s begin by launching UBF Studio. When the welcome screen appears, select “Create New Project.”
Importing Assets & Resources
Studio should now automatically open your newly created project. At this stage, the project is empty, so let’s start adding some content. First, we need to import the 3D model that we’ll be spawning in our blueprint. To do this, open your file explorer and navigate to your UBF project folder. Inside this directory, create a new folder—let’s call it “Resources” to keep things organized. Next, extract the contents of the starter pack you downloaded earlier. Open the extracted folder, select all assets inside, and move them to your project’s newly created Resources folder.
Creating our First Blueprint
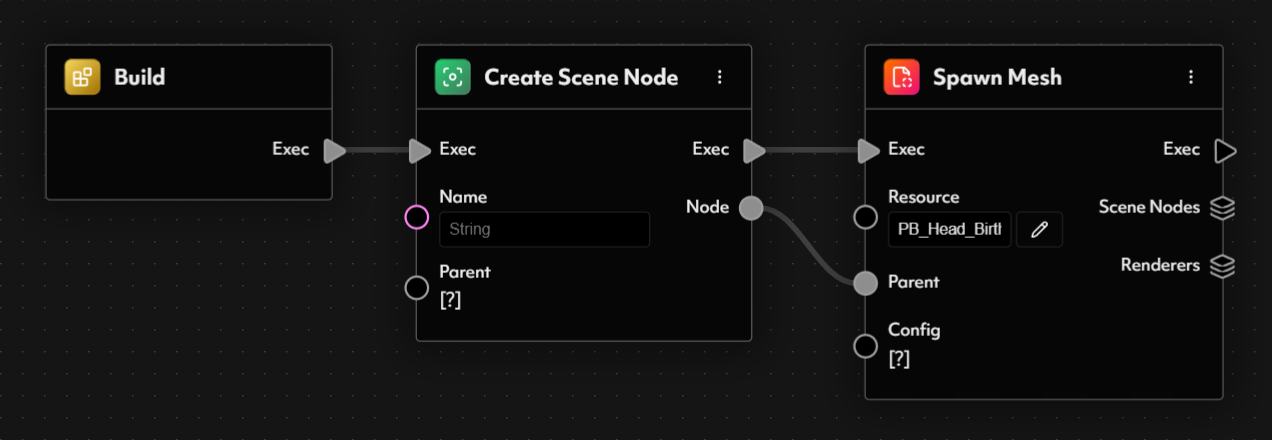
Now that we have our assets imported, it’s time to create our first Blueprint. UBF Studio should already have an open workspace tab labeled “New Blueprint”, which is where we will begin defining our blueprint logic. Step 1: Creating a Scene Node Before we spawn our Party Hat model, we need to first create a Scene Node. Scene Nodes serve as containers within the 3D scene or level in the end experience, onto which other objects—like meshes—can be spawned. To do this, open the Node Library and browse the available nodes. The one we need for this task is the Create Scene Node. Select this node to spawn into the blueprint workspace and connect its execution pin to the Build Node - the starting point of every blueprint. This connection tells the blueprint that the first action to execute will be the creation of this Scene Node.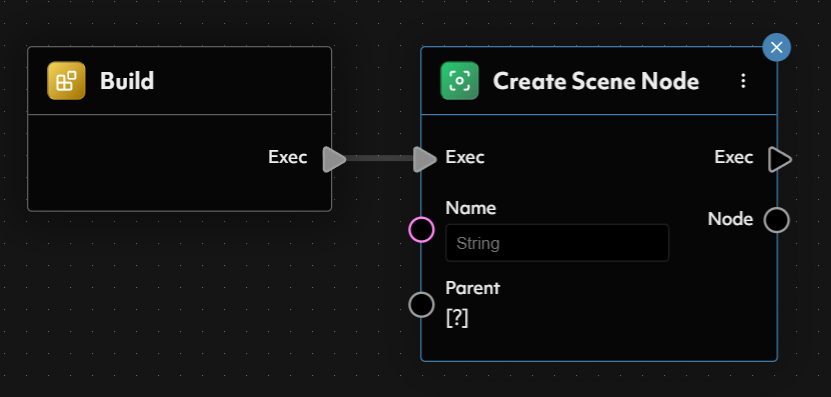
Name and Parent, but since these aren’t necessary for our current task, we’ll leave them at their default values.
Step 2: Spawning a Mesh
Next, let’s spawn the Party Hat model. Locate the Spawn Mesh node in the Node Library, select it to spawn it into the workspace, and connect its execution pin to the Create Scene Node.
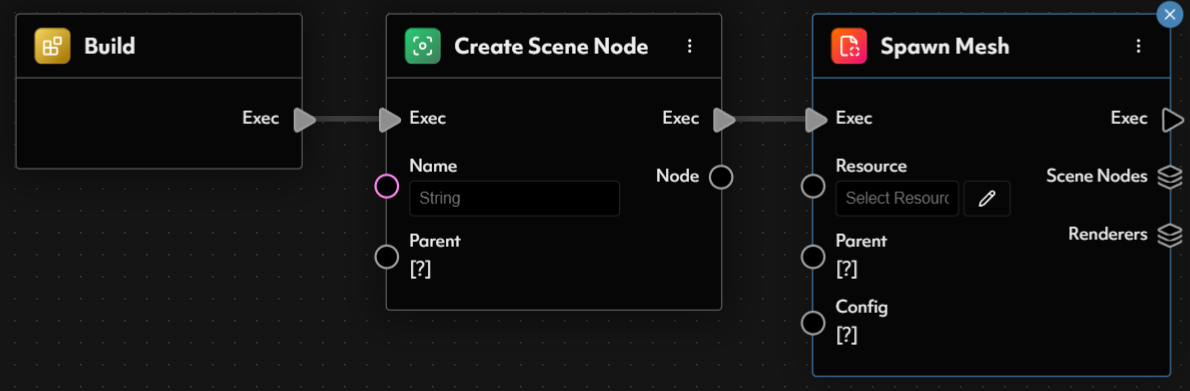
Resource<Mesh> in the blueprint so that blueprint instances can dynamically specify which model to spawn. Alternatively, we can hardcode the model directly into the node.
Since the only thing we want to change between blueprint instances is the color of the Party Hat, but never the actual model, we will opt to hardcode the mesh selection.
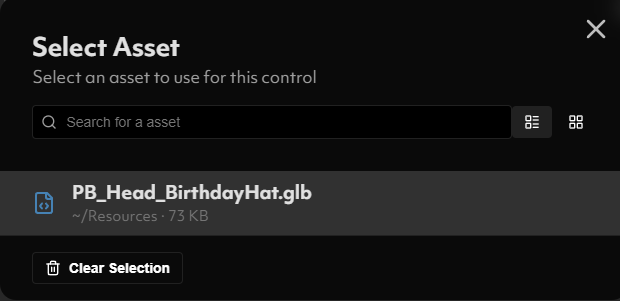
Click the Edit (Pencil) Button next to the Resource pin and select the PB_Head_PartyHat mesh—the model we imported earlier.
Node pin from the Create Scene Node and connect it directly into the Parent pin of the Spawn Mesh Node.
PartyHat.
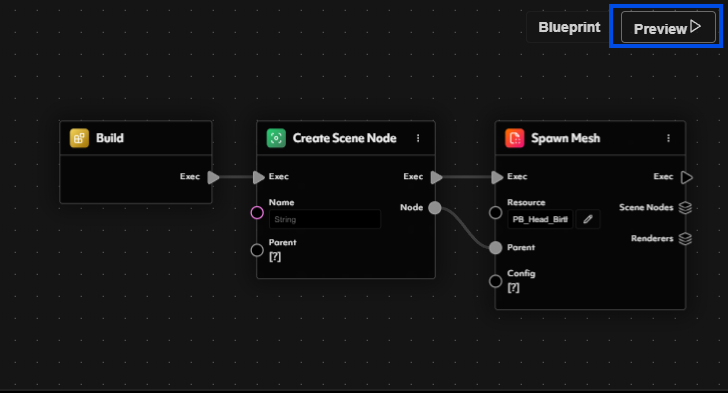
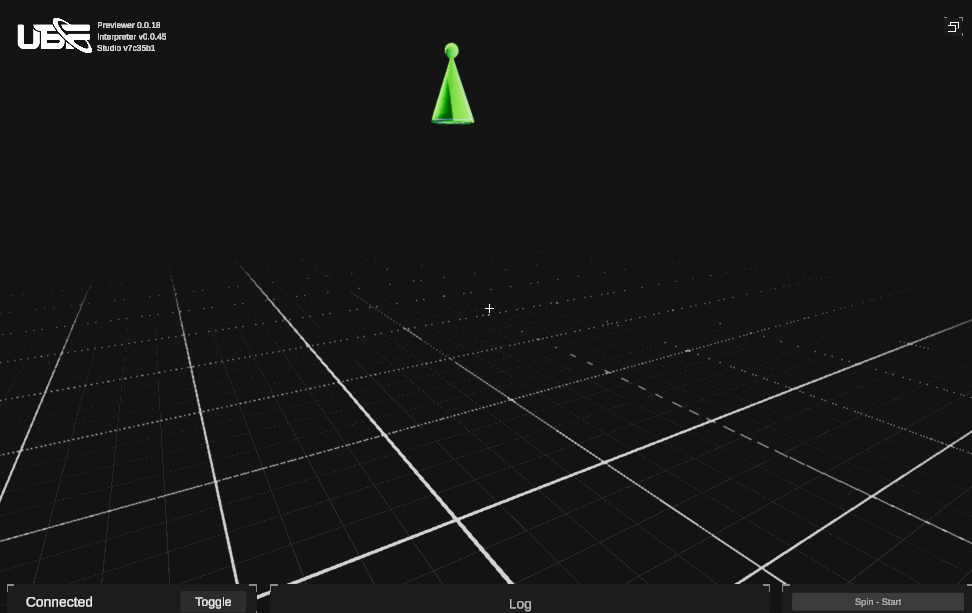
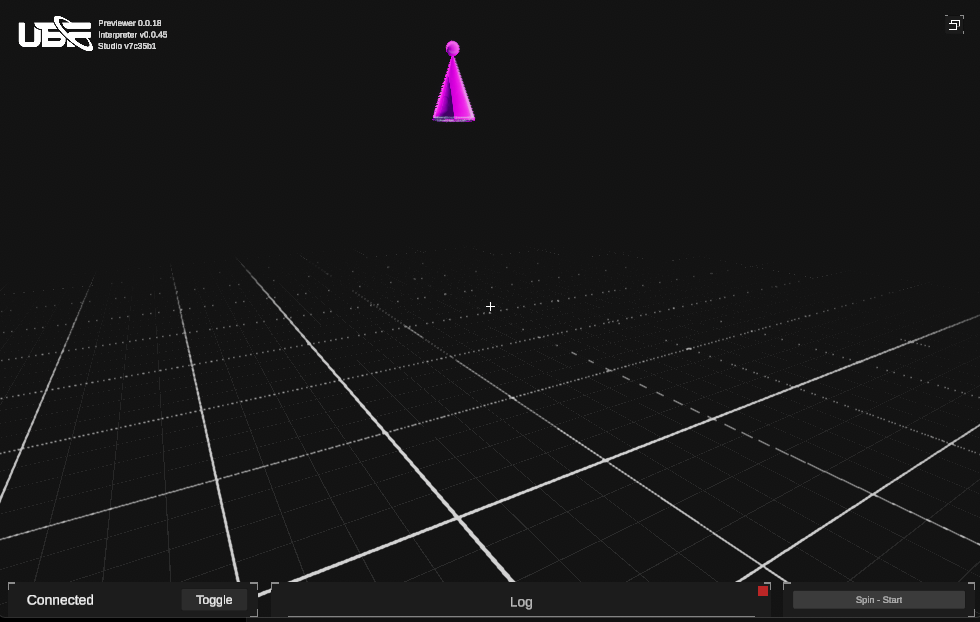
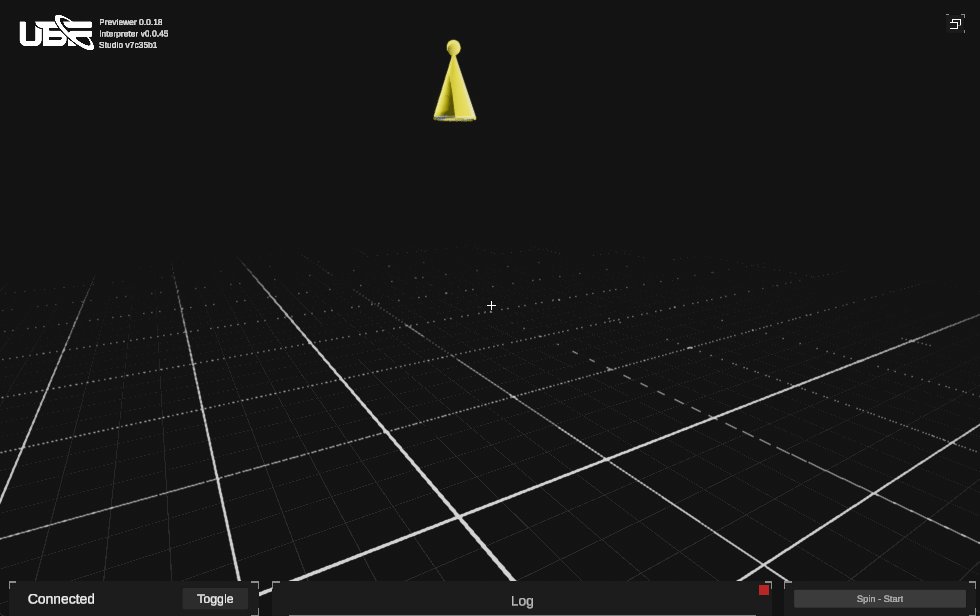
At this stage, we should now have a functioning blueprint that spawns a Party Hat into the scene - but how do we know this is true and how can we test this is actually the case? We will need to lean on our previewer to validate we are making steps towards our desired outcome.
Previewing Our Creation
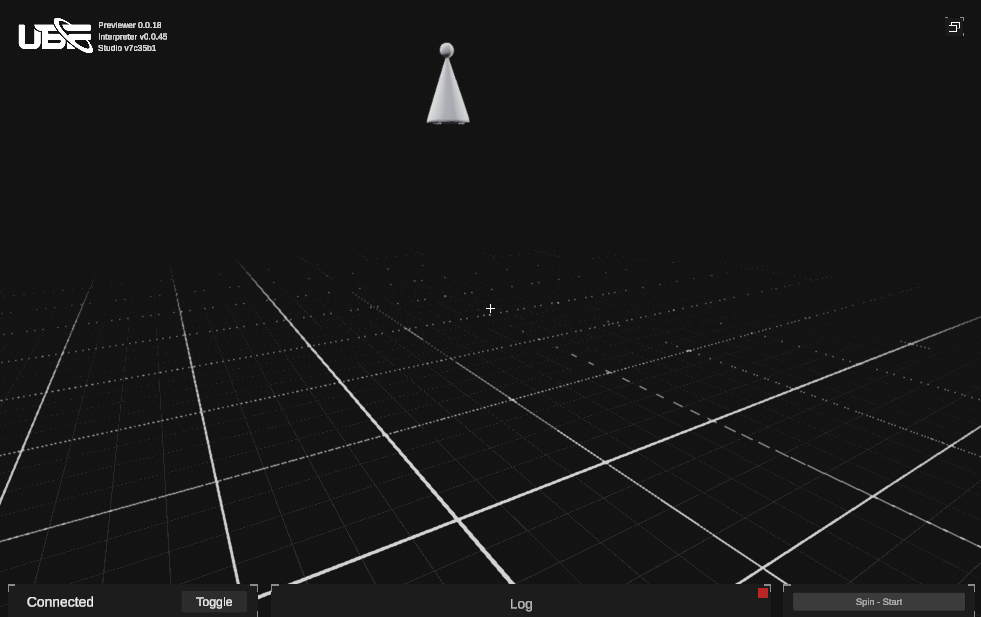
With UBF Studio still open, we can now launch the UBF Previewer to begin testing our blueprint in real time. Once the Previewer application has loaded, switch to Live Preview Mode by clicking the Live Preview button located in the top-right section of the viewport. A confirmation prompt will appear—simply click Yes to proceed. At this point, the previewer should be in Live Edit Mode, and a direct connection between UBF Studio and the Previewer should be established. To confirm this, check the connection status displayed in the bottom-left corner of the Previewer screen.
Adding a Splash of Color
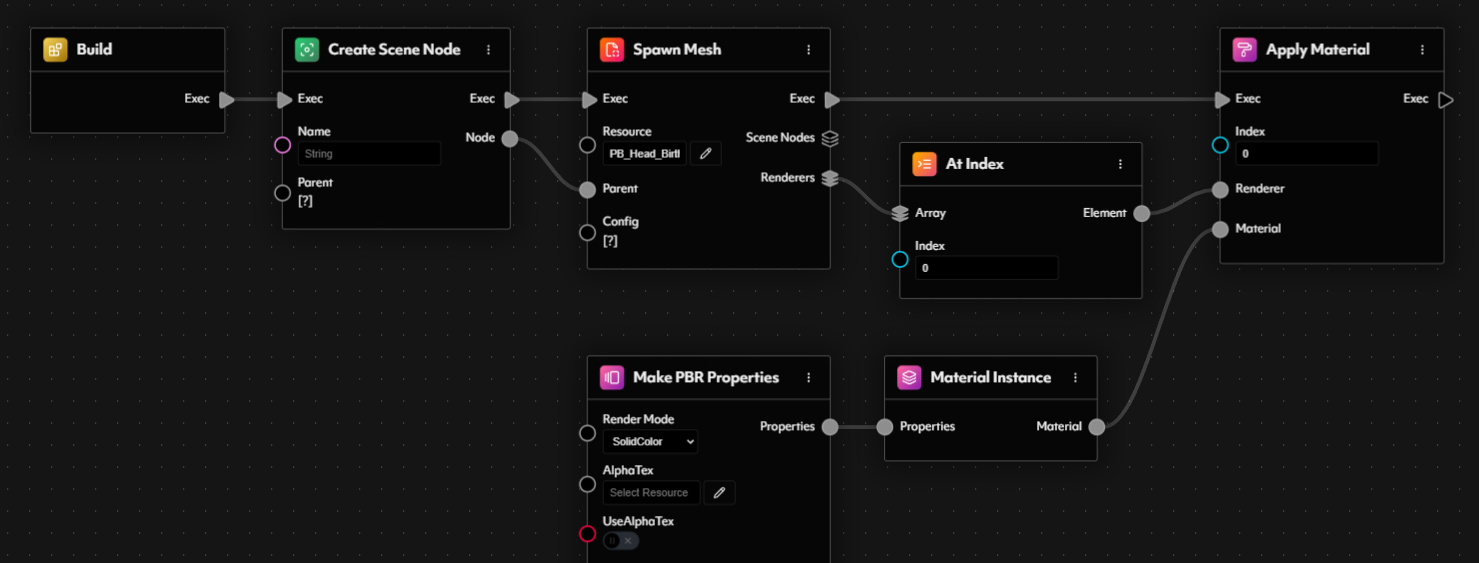
Now that we’ve successfully spawned the 3D model of our party hats, let’s take things a step further and introduce some color! In digital rendering, an object’s appearance on screen is determined by a shader—a specialized program responsible for calculating the final color of each pixel based on lighting, materials, and other visual effects. A material acts as a layer on top of the shader, allowing us to define specific properties such as color, texture, and transparency. To give our party hats some life, we need to apply a material to our newly spawned mesh using the Apply Material node. From the Node Library, find and add the Apply Material node into your blueprint. Next, connect the execution pin from the Spawn Mesh node to the Apply Material node. This establishes the correct execution flow—ensuring the material is applied only after the mesh has been successfully spawned.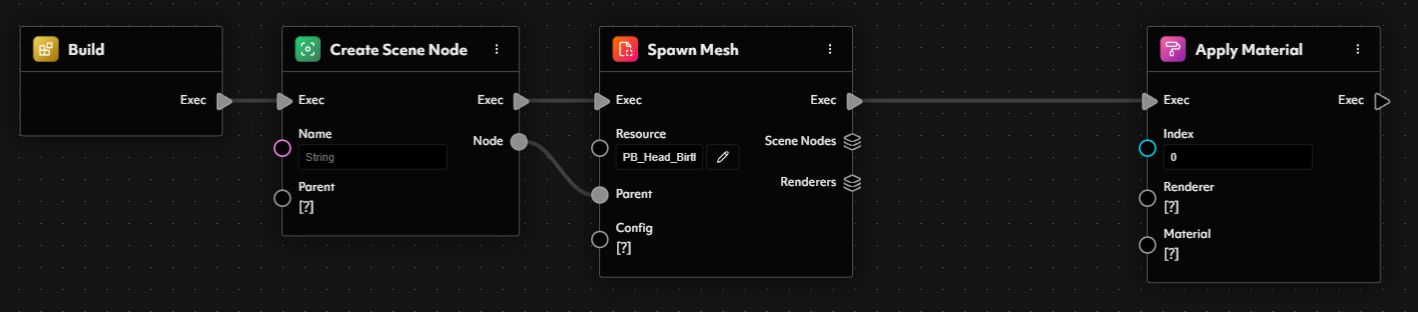
0 (which targets the first slot).
Renderer Input Pin
Renderer is the component responsible for taking a mesh and a material and combining them into a final visual result.
Because a mesh may contain multiple renderers, the Spawn Mesh node provides an output pin of type Array<MeshRenderer>. In our case, the party hat mesh only has one renderer, so we just need to extract the first element from this array.
To do this, we can use an At Index node:
- Select the At Index node from the Node Library to spawn it into the blueprint.
- Drag the
Renderersoutput from the Spawn Mesh node into theArrayinput of the At Index node. - Set the
Indexinput on the At Index node to0(to retrieve the first element). - Connect the At Index node’s output to the
Rendererinput of the Apply Material node.

- Make PBR Properties – Defines the material’s properties such as color, texture, roughness, and metallic attributes.
- Material Instance – Takes the properties from the first node and generates an actual material instance.
Properties output of the Make PBR Properties node to the Properties input of the Material Instance node, then, connect the Material output of the Material Instance node to the Material input of the Apply Material node.
- Select “Solid Color” as the render mode at the top of the properties.
- Set the Base Color to any color of your choice using the color picker.
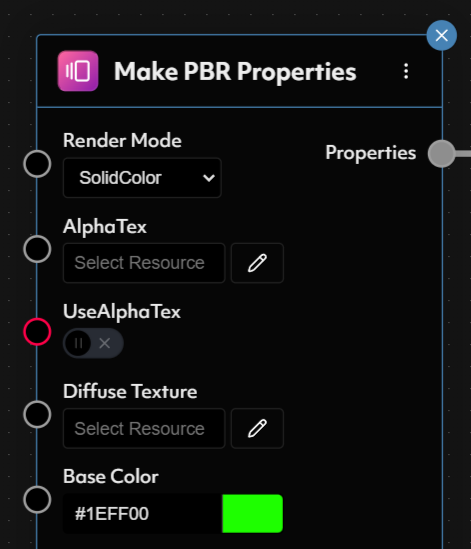
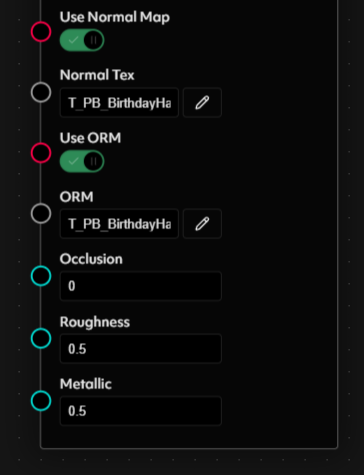
- Enable Normal Maps and ORM Textures.
- Assign the appropriate textures:
- Normal Map:
T_PB_Head_PartyHat_NR_1024 - ORM Texture:
T_PB_Head_PartyHat_ORM_1024
- Normal Map:
- Set Roughness and Metallic values to
0.5.
NOTE: This workflow is expected to evolve in an upcoming update, eliminating the need to manually create a properties object and pass it into a material instance. Instead, materials will be directly configurable within a single node.
Dynamic Colors for Maximum Party Impact
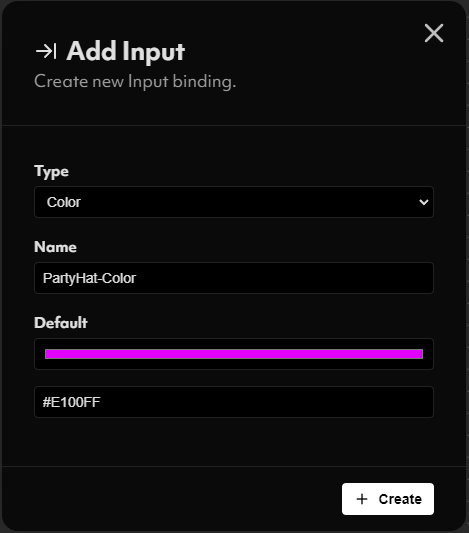
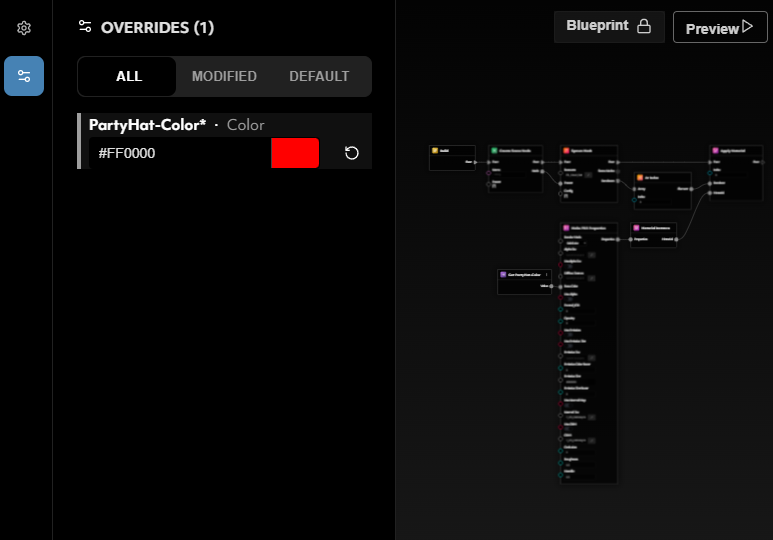
Our party hat is looking fantastic, but right now, it’s limited to a single color—whatever we manually set in the Base Color property of the PBR Material Properties node (green in the example above). If we’re going to throw the most exciting party in Fluf World, we need variety—hats in every color imaginable! To achieve this, we need to remove the hardcoded color and instead make it a dynamic input. This will allow the color to be defined externally—meaning different instances of this blueprint can generate party hats of different colors without modifying the core blueprint. Navigate to the Inspector Panel on the left side of the Blueprint Viewport and select the Blueprint Inputs menu.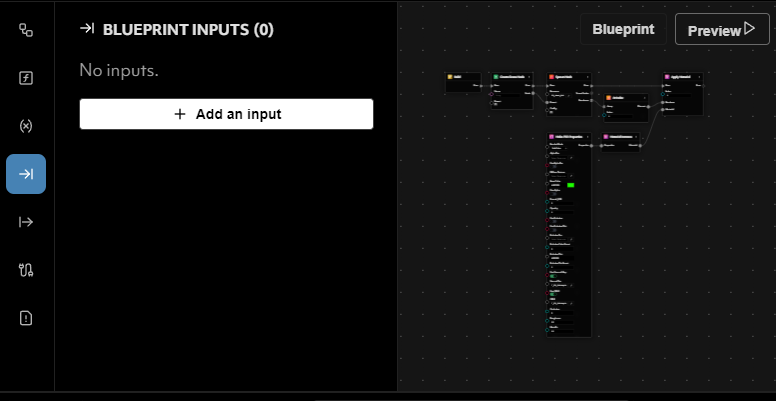
PartyHat-Color, and assign it a default value—this will be the color applied when no other value is specified.
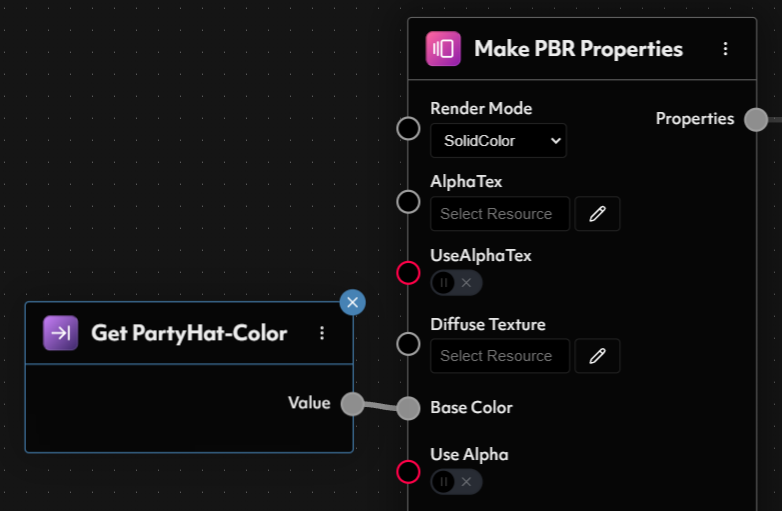
Get PartyHat-Color node directly to the Base Color input of the PBR Properties node.
This connection ensures that the base color of the material is now determined dynamically at runtime, instead of being permanently set within the blueprint. By changing the value of PartyHat-Color, we can modify the appearance of the hat without needing to create an entirely new blueprint.
Scaling Up the Party—The Power of Blueprint Instances
By exposing color as an input in our blueprint, we’ve unlocked the ability to create multiple party hats, each with a unique color. If we wanted to support a variety of colors, one potential (but highly inefficient) approach would be to duplicate the blueprint multiple times—creating a separate blueprint for each color. While this may seem like a quick solution, it introduces significant duplication and unnecessary maintenance overhead. Imagine needing to tweak something in the base blueprint, such as adjusting the size or adding a new feature. With multiple copies, we would have to manually update each one—a tedious and error-prone process. Instead, we can leverage Blueprint Instances to efficiently manage variations while keeping everything organized and reusable. If you haven’t already, take a look at the Blueprint Instances section of this documentation, where we explore their full potential and when to use them. To create an instance of our Party Hat Blueprint, navigate to the Instances menu in the Blueprint Inspector. Here, you will see an option to Create Blueprint Instance—press this button, and a new instance will be generated.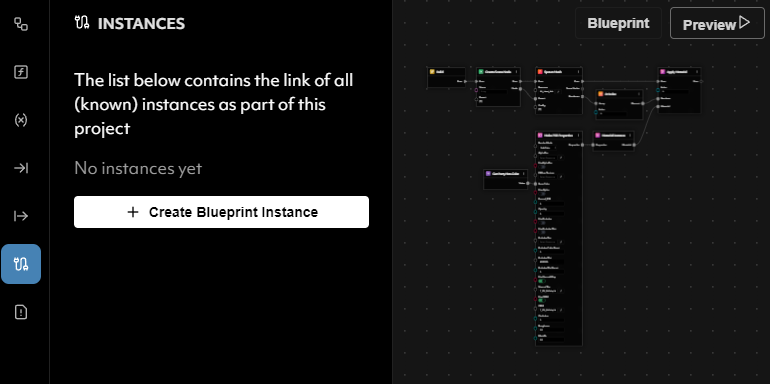
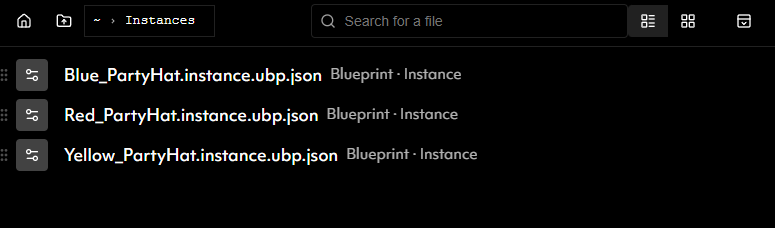
Color is just the beginning! Using Blueprint Instances, we can modify anything that the base blueprint exposes—whether that’s changing the model, swapping out textures, adjusting materials, or introducing different accessories. This powerful system enables us to build highly flexible content that is both dynamic and reusable, making our creations more efficient and scalable than ever before.